3d artist,  mumbai,  india               91-09323283056             vinnychirayil@rediffmail.com
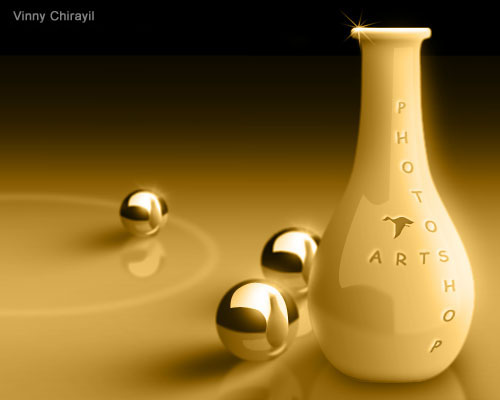
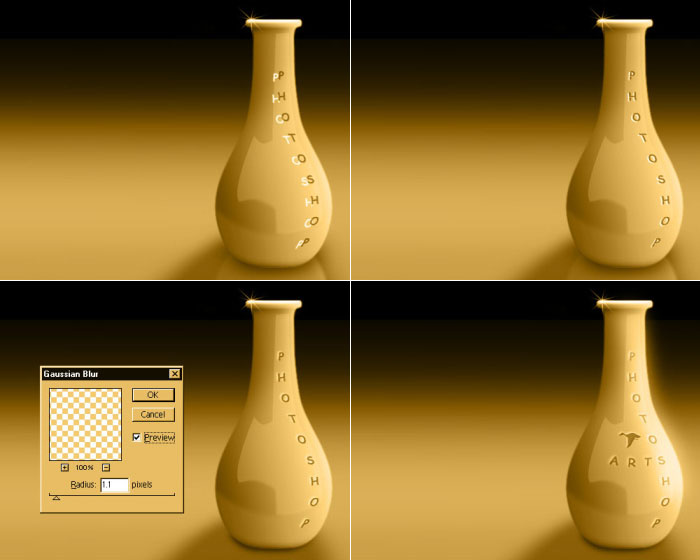


Back to Photoshop tutorials


The making of Vase

 This image was inspired by a similar XSI render done by Baruch Zevolun, Israel. The design credit goes to him.
     
 This tutorial has been published at 3dtotal.com & graphics.com also.

The following example can be done by anyone who is familiar with Photoshop. You don't have to be a great artist. Only the basic tools of the software along with a keyboard & mouse have been used. A tablet or digital pen is not required.To playback the full sequence as a slideshow (in ACDSee), you can download the zip file VaseAnim.zip

Ok, lets start now.


1) Creating the ball

I started by drawing a circle & filling it with white color. A simple linear gradient was then applied and tada - the flat 2D ball is transformed into a 3D ball ! Only the shadows are missing. Lets fix that. I drew an ellipse & filled it with black. Rotated & blurred it slightly.

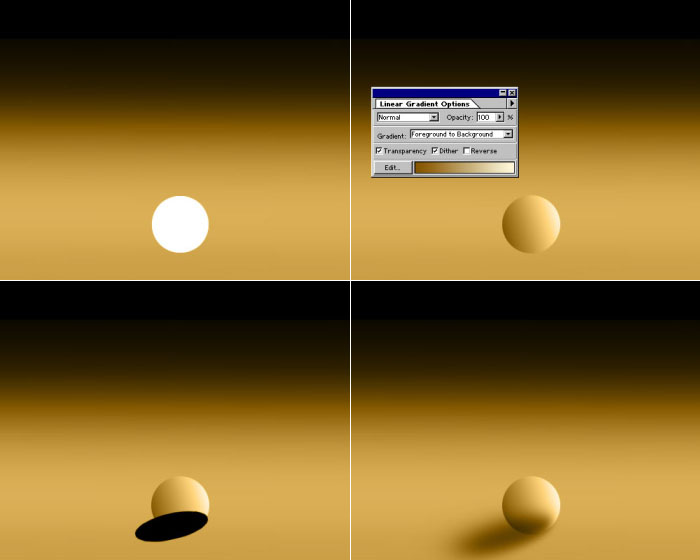
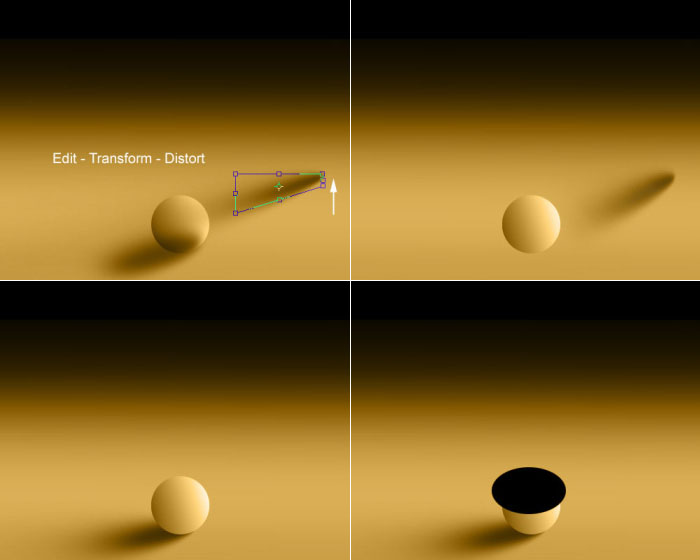
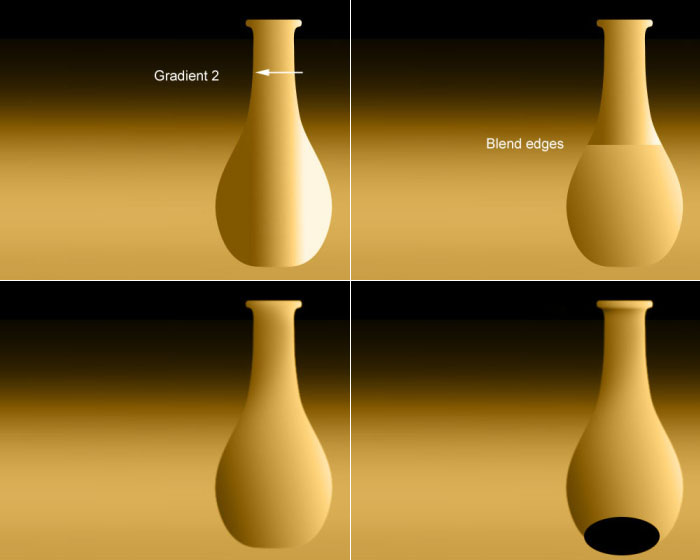
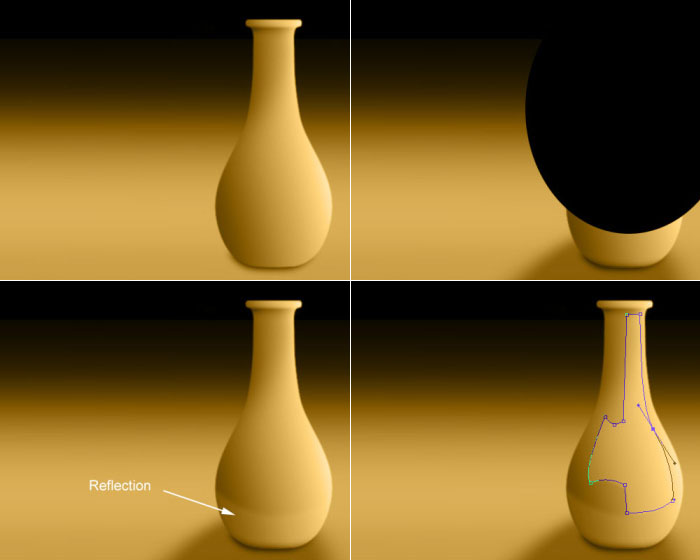
To simulate the effect of area lights (i.e. shadow fades with distance), I used the 'Distort' tool under Edit\Transform menu. Put the shadow back in place & it looks just like an FG/Global Illumination render.

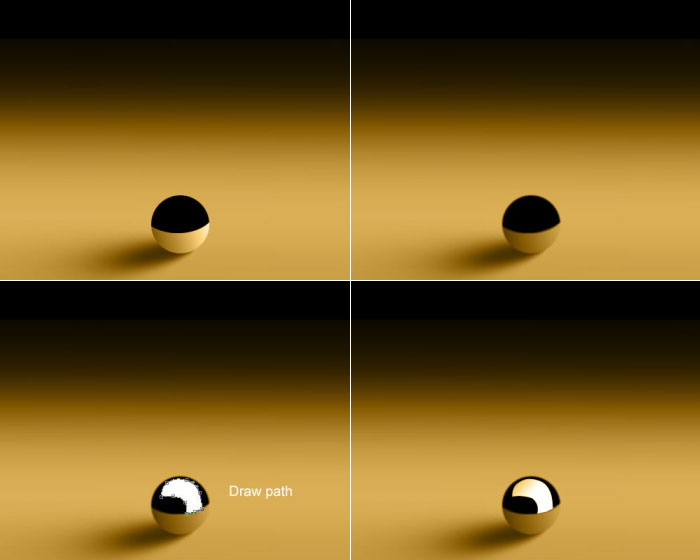
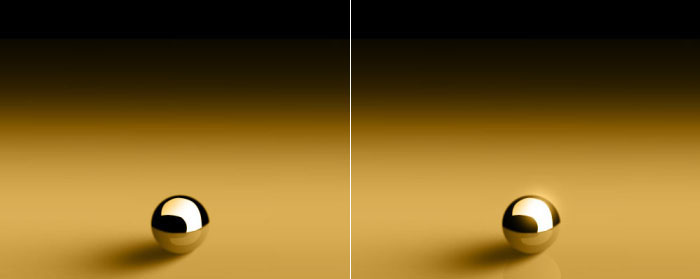
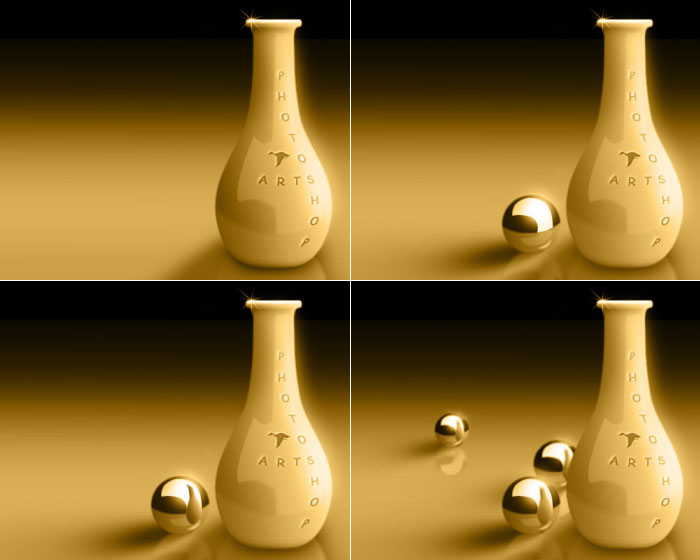
Now for the reflection. Imagine the ball is on a table. The ball would show in its reflection, the opposite edge of the table. To do this, I made a black ellipse on top of the ball layer (I forgot to mention, I am working in layers !) and retained only the part inside the ball area. Blurred it slightly to soften the edge. But the ball still isn't looking glossy & reflective. This is because it is reflecting only the table & pitch black area over it. If we had a white board(reflector) nearby, its reflection would be seen on the ball. With the 'Path' tool in Photshop, I drew a shape on top of the ball layer. Converted it into a selection, filled it with white, followed by a slight dash of color on it.


If the table was also reflective, then white board's reflection would be seen on it. And this, in turn would be visible on the ball. So I flip the shape which I made just now & reduced the scale & opacity of the layer. Now, add the ball's reflection on the floor, add a little glow on the highlight & voila !. A shiny chrome ball is ready !


2) Creating the vase

With the 'Path' tool, draw a vase. Repeat the 2D to 3D magic. Only, this time instead of one gradient, 2 will be required. I then blended the edges of the 2 gradients to get a 3D vase.


Shadows next.Carefully, paint shadow on the neck of the vase with a brush tool. Draw a black ellipse at the base of the vase. Repeat the previous technique used for the ball. This time, I added a second shadow for the vase as if cast from a light at the front right. Add the reflection of the table on it. Now the interesting part. To instantly add the ceramic gloss to this vase, draw the shape shown in the image, convert to selection, increase its brightness. Do not fill colors. This will remove the shading present in the reflection.


To remove all doubts about my vase's glossiness, I used a star-shaped brush & clicked on the neck of the vase once, after painting a white highlight on the neck's upper part. Now for some show-off : engraved text. For this, type the letters vertically, bend it with the 'Shear' tool under Filter\Distort menu.

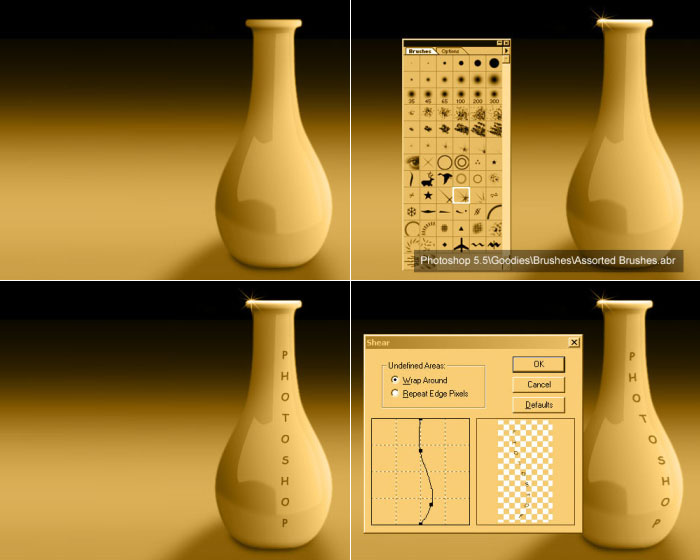
Make a copy of the layer & fill it with white. Move this layer below the original text layer. Offset it slightly to the left & bottom. Now, add reflection of the vase on the floor, some glow on the vase & voila again !


3) Bring it all together

At this stage, I have 2 files - Ball.psd & Vase.psd. I merge the layers of both & import into a new file. Its not over yet. Lets add the vase's reflection on the ball followed by a little bit of Crowd Simulation !


Some bounce light on the vase & we are done at last. Phew !


Back to Photoshop tutorials


Website designed & developed by Vinny Chirayil

Copyright @ 2005 Vinny Chirayil


____________________________________________________________________________________________________