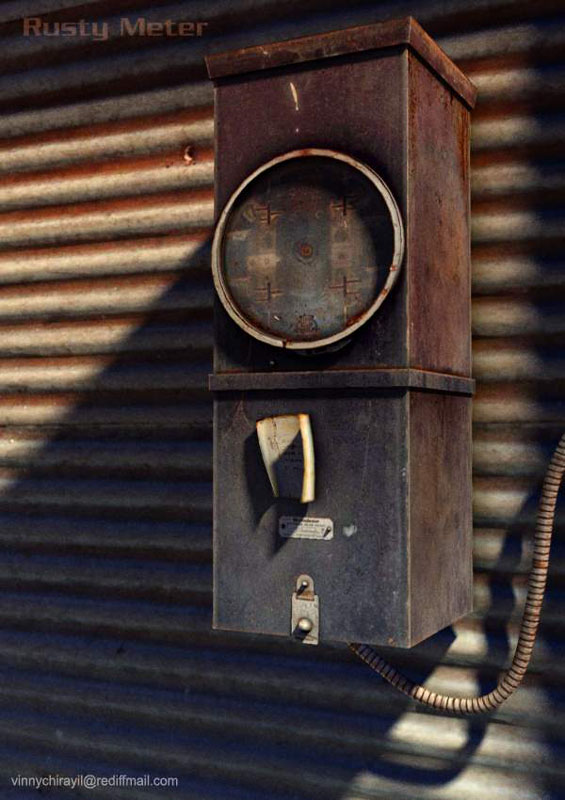
|
The
inspiration for this image came from an old photo of a
meter in
an abandoned factory. This tutorial has been published
at
3dtotal.com
also.
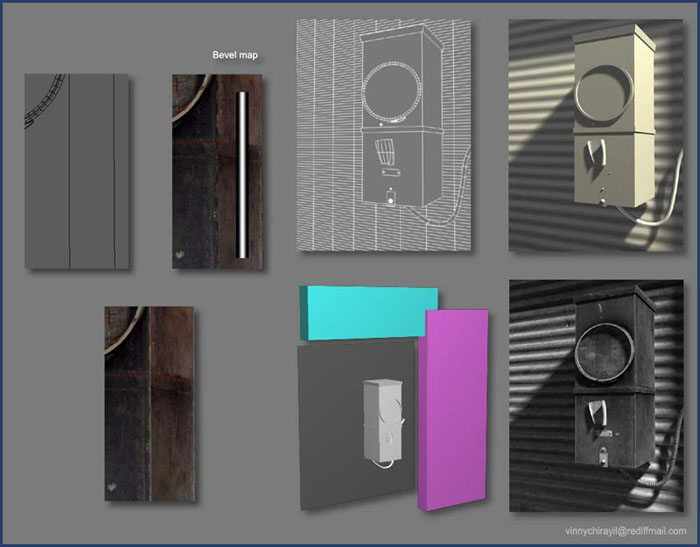
1) Modeling
I started by making a simple cube against a vertical
grid. The meter
originally had a thin wire coming out from below. Since
this lacked a
personality, I decided to replace it with a thicker
metal cable, the type
you find in old public telephones. Next, the smaller
details of the meter
were added. I deliberately avoided beveling any of the
parts, choosing
instead to achieve the look in texturing. This approach
keeps the whole
set extremely light and is commonly used in the gaming
industry.
2) Lighting
I did a basic lighting first before getting into
texturing. To simulate
the sun, a spotlight with high intensity & yellow color
was used. Two
additional white fill lights were also used. To get a
tint of blue in
the shadows, I gave a negative shadow umbra value to the
key light. By
doing so, the shadow gets a color opposite to the light
color and in
this case blue is opposite to yellow.
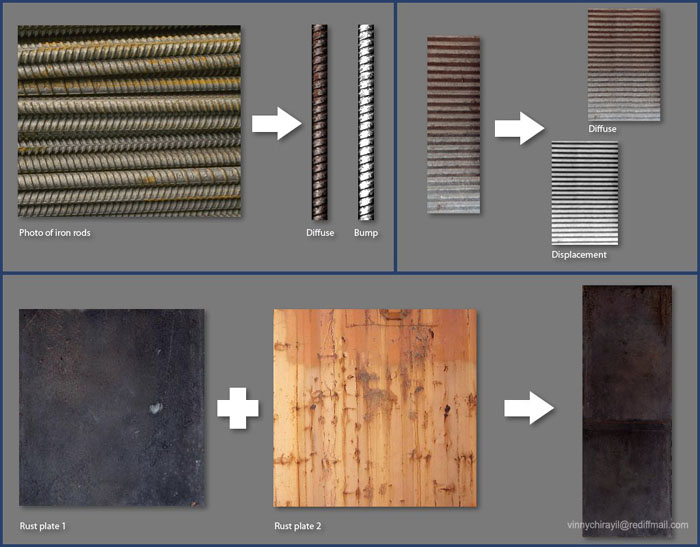
3) Texturing
Having a large collection of textures & good photos
serves as a good
hunting ground to get things started. After finding the
right images,
I started cleaning them of unwanted details. The clone
tool in
Photoshop was particularly helpful in this. For
texturing, I always
prefer hunting for a good photograph similar to the
desired look rather
than blending multiple textures. I believe 'Natural' is
best. In some
cases, bits of an image were cloned repeatedly to create
a much larger
image. I normally do texture layering in Photoshop &
prefer importing
the flattened texture into Softimage XSI. Mixing
textures in 3d is
minimized as far as possible. This approach makes your
work easily
portable across different softwares.
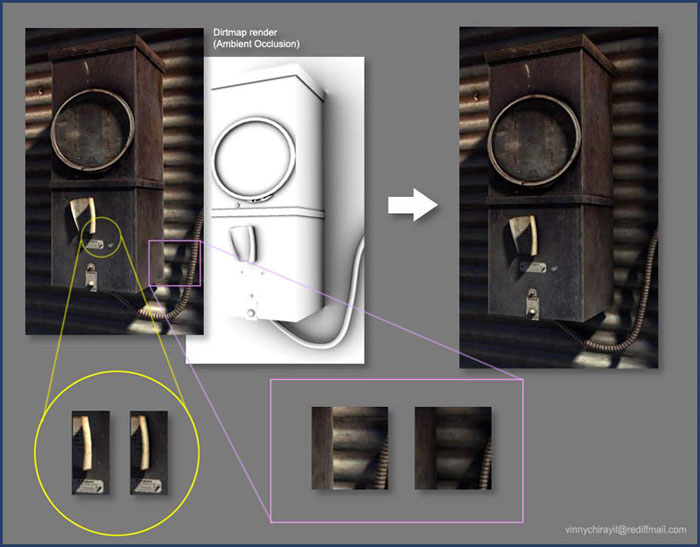
4) Lighting re-visited
Once the textures fell into place, I was not very happy
with the
initial lighting. To add the illusion of the whole set
being larger than
what it was & also for a better image balance, I needed
some shadows falling
onto my scene. I achieved this by placing 2 boxes - one
on top and one
on the right side of the Meter. Though they themselves
are not visible,
their shadows cast a nice look.
I used an XSI shader called Dirtmap, which works on the
ambient
occlusion principle, for generating a diffuse shadow
layer. The shader
is available for Maya also but if you don't have it, try
getting a
similar result with Final Gathering / Global
Illumination techniques or
even through a dome-shaped array of shadow casting area
lights.
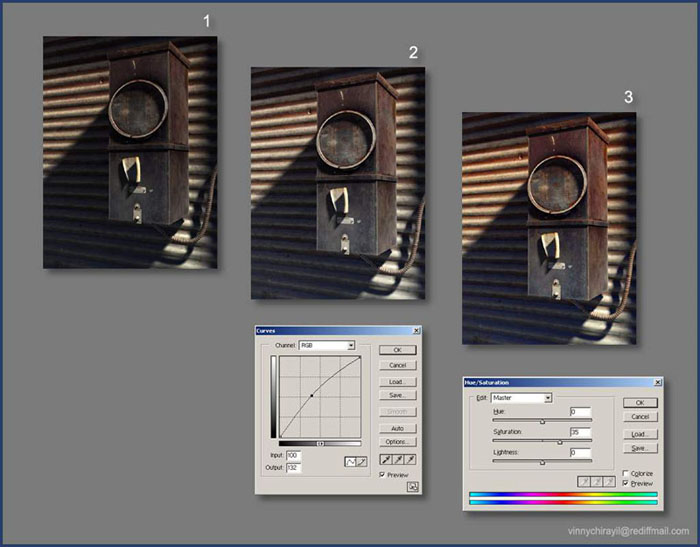
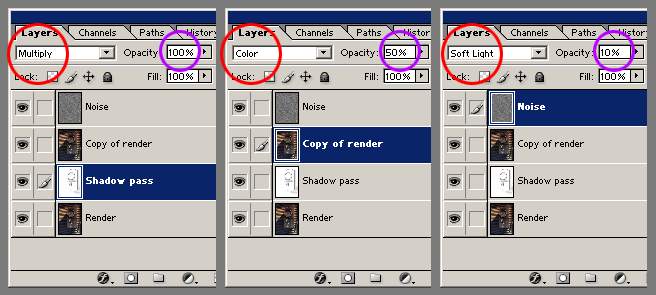
5) Compositing
Using the Adjust\Curves tool of Photoshop, I lifted the
blacks in the
render & then increased the saturation slightly to bring
out the rust
colors. The shadow layer was rendered separately and
with the 'Multiply'
option in Photoshop, placed on top of the normal
rendered image. However,
this makes the shadow regions lose their color and it
changes to black or
shades of grey. To compensate this, I made a copy of the
bottom most
layer & layered it on top of the shadow layer with 50%
opacity and the
blending option set to 'Color'. Now the shadow regions
take the original
color of the underlying image. Next, a black & white
noise layer was
prepared using the 'Noise' filter, blurred slightly &
layered on top of
the previous composition with an opacity of 10% and
blend option set to
'Soft light'.
The rusty meter is ready for display at last !
Back to XSI tutorials
|
